Search This Blog

Monday, 22 November 2021

Android phone hard reset

I'd previously posted about the processes involved in setting up a new phone.

Since that time, just under three years ago in fact, I've moved to a OnePlus 6. It's a nice phone, with plenty of RAM and storage, still responsive and snappy and generally good..... apart from battery life. It can be very poor at times. Listening to an hour's worth of podcasts, reading some email and blogs and referring to Google Maps has been enough for the phone to go from 100% to a full switch off in around 6 hours.

As they always do, the manufacturers suggest a hard reset. Hard is the operative word. It's the pain of having to get everything set up again that is perfectly encapsulated in that word.

This post is therefore intended to summarise the steps involved in getting the phone operative again, with any shortcuts I've found (some after the fact).

First point is that Google Transfer Wizard doesn't work with OnePlus at present! Well, it *does*, but not if you have security on your phone. Clearly that's not optimal.

However, OnePlus phones have an option called OnePlus Switch. This sets up three directories on your phone (within subdirectory of opbackup):

  • App
  • Data
  • OPLauncher
These directories can then be uploaded to a cloud service, downloaded to your new or reset phone, and restored.

The issue is with the App folder - it can get very big (in my case c5GB), which makes the upload / download process pretty inefficient or not even working.

On the basis that all apps will be in the "Library" on Google Play Store, I therefore decided not to download these to the new phone. I am unsure whether the OnePlus Switch approach brings in all app defaults, which would of course be simpler.

"Data" includes calls and SMS. In hindsight, I did not need these as I have other apps that restore them.

"OPLauncher" includes wallpapers, app groupings and group names.

So, that being said, it's a case again of ensuring individual apps are appropriately backed up.

This is straightforward with Google Photos, as images should be uploaded automatically. These can be checked before the phone is reset.

Mail, Drive, Maps, etc are even simpler.

1Password is now web based, so setting up on a new device is again easier than in the past.

The biggest welcome improvement, as it was the most inconvenient step before, is with Google Authenticator. It now includes a "Transfer accounts" option that allows, by scanning of QR codes, for all the MFA accounts on one device to be set up on a new device.

Importantly, this procedure does not remove the MFA accounts from the first device. This means that users can have the option of finding an MFA token from more than one place, which is more convenient.

In the case of a hard reset, therefore, the transfer accounts option would be invoked to a secondary device, and then ran again from that secondary device back to the phone being reset. MUCH simpler than having to disable and then re-enable all of the individual accounts!

WhatsApp and Signal both have the ability to back up chats - WhatsApp's can go directly into Google Drive, Signal's go to a local folder on the phone which can then be backed up to cloud storage.

SMS and calls, as I said before, are a different matter. I use two apps in that regard. SMS Backup & Restore carries out backups on a predefined schedule and saves these to local storage. 

SMS Backup+ allows SMS messages to be backed up to Gmail, which then become searchable. It has to be set up via IMAP.

I also from time to time use Textra as my main SMS app to purge old messages (they can be done individually rather than having to delete all messages from a contact, as the stock Android app works) once they are copied into Gmail.

Which brings me to... an ability to easily move locally stored data and settings to the cloud. There are a trio of products that work with the main cloud storage options (DriveSync, BoxSync and Dropsync) to allow uploads or syncing to take place.
 
I use all three to varying degrees and they work very well, backing up my local downloads, screenshots, podcast settings and my SMS.

Referring to podcast settings, the app I use (Podcast Addict) has a weekly backup routine that covers all existing subscriptions, including which episodes have been listened or downloaded. This again is backed up from local to Drive with DriveSync.

With all these steps in place, the hard reset can take place. Even with all these taken account of, restoring everything to how it was before is still the best part of a couple of hours.

Restoring the phone

  • The phone's setup routine will require fingerprint unlock to be set up. The next step is to restore to the phone the opbackup folder and sub-folders previously referred to. Once done, OnePlus Switch is put into restore mode. 
  • This restores the wallpaper and icon groups, with greyed out icons for the apps not yet installed. These can then be installed from the Play Store.
  • If a custom ringtone was previously used, it needs to be restored to the phone and set as the new default. 
  • The phone's name can be changed to its previous (if amended from the factory default) and so can the hotspot name (so devices that previously used this will find the reset phone).
  • Podcast Addict requires the install of "Podcast Addict - Donate" as well as the main app, and then the restore of the backup file will bring the app back into the state it was prior to reset.
  • Any apps that previously used fingerprint based passwords will need these set up again. 
  • Any devices previously connected by Bluetooth will need to be set up once more as well. In the case of a Google watch that means the watch itself is essentially reset too.

Defaults to be restored

  • Device specific
    • Gestures
    • Hotspot
    • Sounds
    • Status Bar
  • Gmail compact, dark:
  • BBC News - also turn off Notifications

  • Clipper+


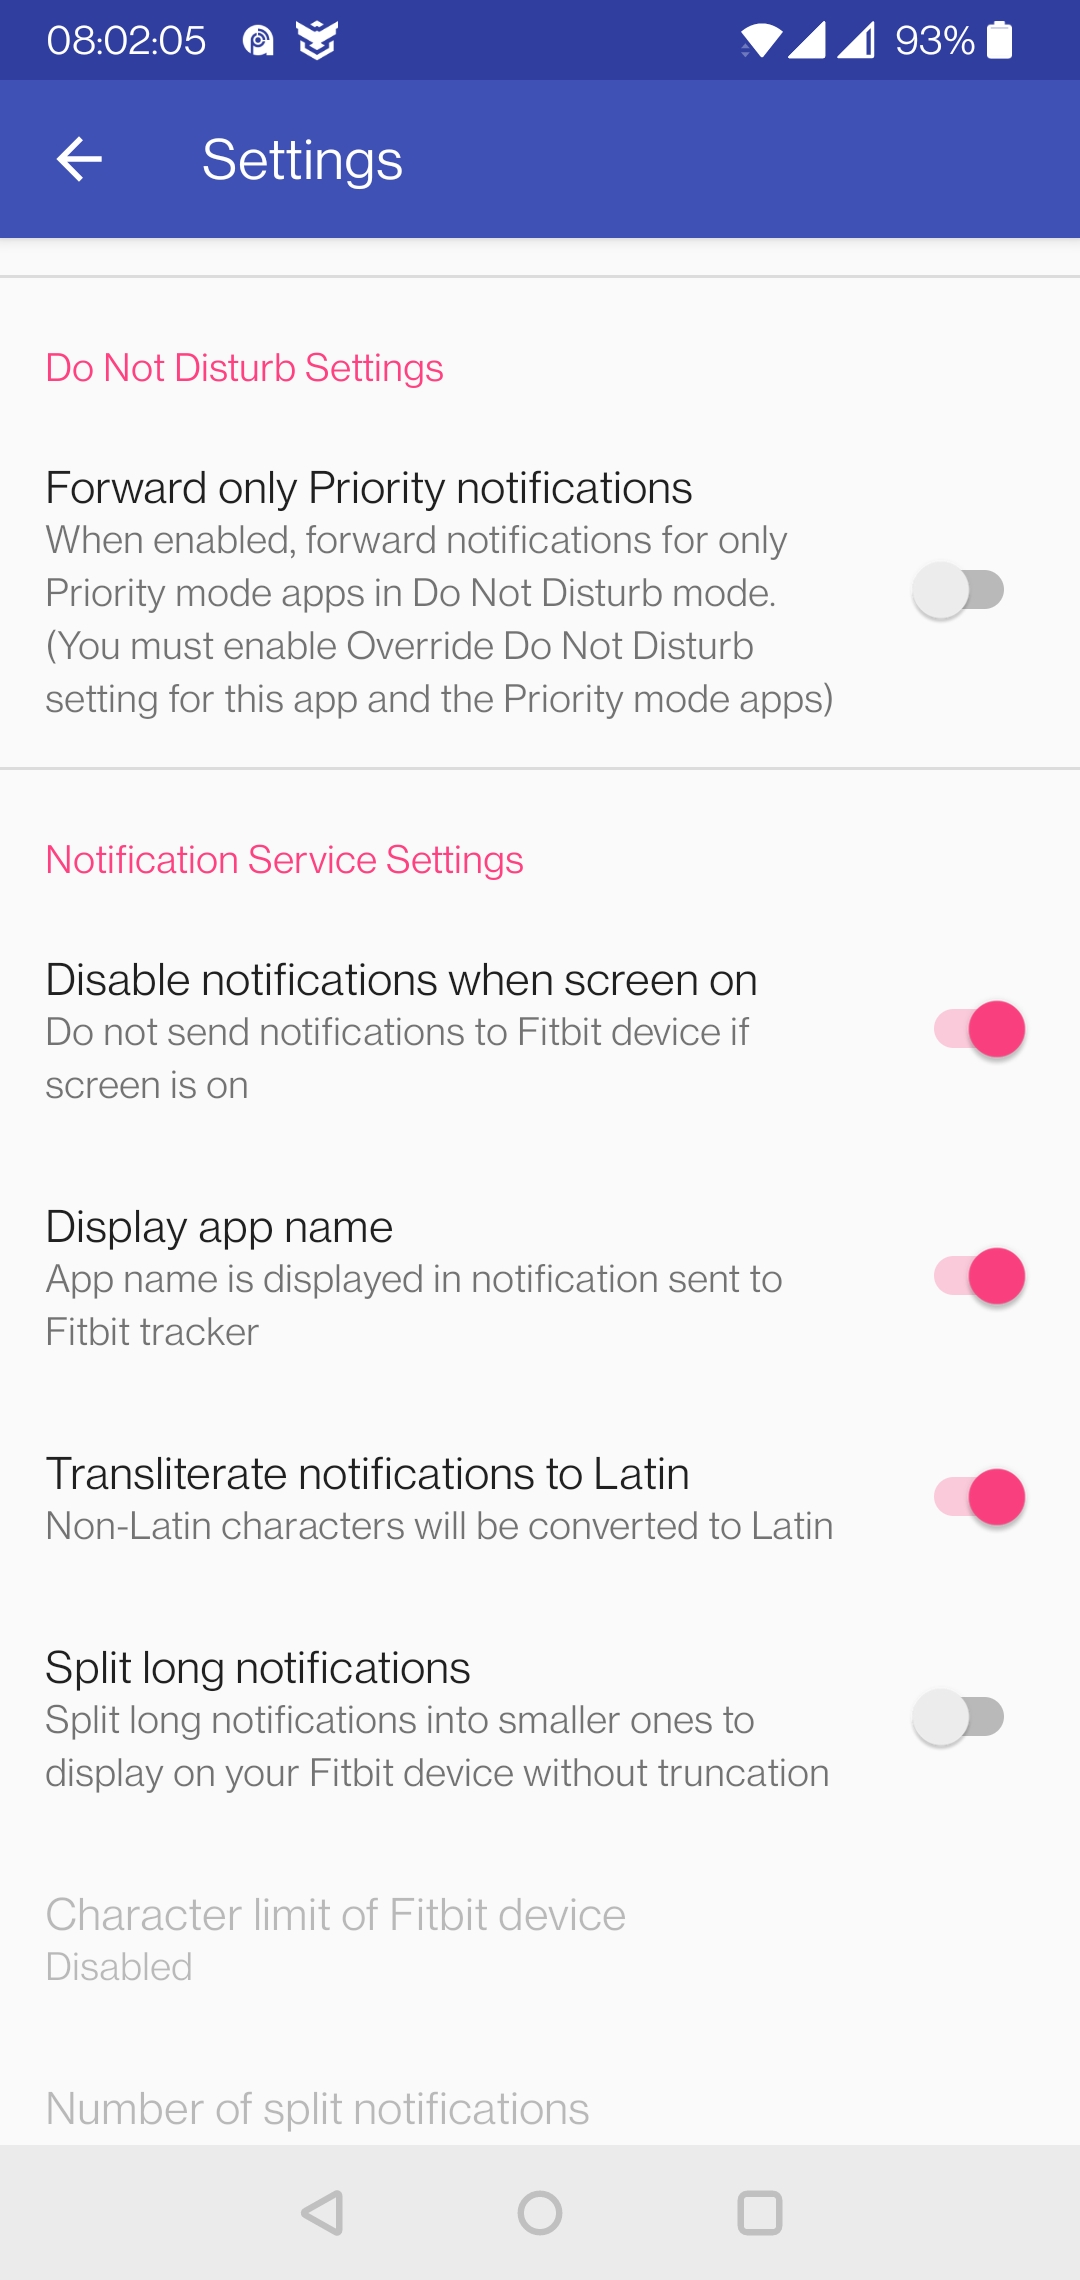
  • Fit Notifications


  • Ring


  • Twitter


Saturday, 27 January 2018

Putting my cuttings online

For some time now I've been meaning to publish the various reviews, features, etc that I've had sitting in boxes. But I also wanted to make the text searchable.

Fortunately this is a considerably easier task now with online OCR services. For my part, I've been using http://www.newocr.com/ and then manually correcting any errors I've spotted. If any errors still creep in, that's all down to me not checking properly.

My intention is to publish the scanned (or in some cases photographed, where the article wouldn't neatly fit on a flatbed scanner) article, along with the text. Where I have other relevant information (e.g. the setlist of the concert) I'll include that too.

I've a lot to get through, so this will be periodically updated!

Monday, 19 September 2016

Addressing speed issues with new iMac

Having bought a new iMac (well, Apple Store Refurbished) and transferred everything from MacBook (worked very well), I was disappointed to see how slow it was going. Applications took what seemed like an eternity to open, thumbnails were slow to load, numerous swirling balls of death, etc.

After searching, I made a number of changes. I'm not 100% sure which of these (or which combination) did the trick, but it's now considerably snappier.

  • Login items. For some reason, CrashPlan was listed twice. So I removed one instance. I also removed Android File Transfer, which doesn't need to be in place at login time.
  • Based on this post, I ran the command 
rm ~/Library/Caches/CloudKit/CloudKitMetadata*;killall cloudd
  • I contacted CrashPlan, as my backup seemed to be constantly in scan mode. They suggested:
  1. Open the CrashPlan app
  2. Double-click the CrashPlan logo in the upper-right
  3. Copy and paste the following bolded text into the box: java mx 2048, restart
  4. Press enter
CrashPlan will close to apply the change.
To confirm that the setting applied, reopen the CrashPlan application and repeat the steps above. This time type java mx in the command line window.

Sunday, 28 August 2016

Adding books from own library to Kindle

Scenario was that books existed on own PC in .mobi format, but away from home so couldn't connect to PC via USB.

After faffing about with the idea of using a USB stick (no joy), a thought occurred. And worked. This was the process.

  1. Upload the .mobi books from the computer to a folder on Google Drive (this could be done with Chrome Remote Desktop, or from the USB stick itself)
  2. Set up an Amazon Kindle email address (see https://www.amazon.com/gp/sendtokindle/email - this requires accessing Amazon account to set up the address)
  3. From Google Drive (probably Dropbox works too), email the .mobi files to the Kindle email address
  4. Connect the Kindle to wifi
  5. Books download onto Kindle
Neat!

Downloading tracks bought from Google Play Music


When a purchase is made (and mine tend to be as a result of credits earned through the Rewards Android app), the question is how to get those files downloaded rather than just in the cloud.

It's actually quite simple. From a desktop machine, go to Play Music, click on the three dots and select Download:


exFAT set up on Ubuntu

Following on from my previous post, I wanted to check drives would mount on Ubuntu. My server isn't fixed yet, so in the meantime I used an Acer Aspire notebook running Ubuntu.

The steps here worked for me, basically

  1. Add the repository: sudo add-apt-repository ppa:relan/exfat
  2. Update the package list: sudo apt-get update
  3. Install the exfat package: sudo apt-get install fuse-exfat
  4. Create the mount folder: sudo mkdir /media/exfat
  5. Mount the filesystem (replace sdc1 with your exfat partition): sudo mount -t exfat /dev/sdc1 /media/exfat
  6. Read and write to /media/exfat to your heart's desire.
  7. When you are done, unmount the filesystem: sudo umount /media/exfat
Then I wanted to compare the contents of drives. The command line answer is

diff -qr dir1 dir2 | sort

but in typical fashion I forgot how to make the pipe symbol appear. However, there is a graphical frontend that will tell me what I need to know - it's called Meld.

sudo apt-get install meld
meld dir1 dir2
That worked just fine.

So now all the drives are formatted as exFAT so should be far more interchangeable. And with my new Smart Router coming from BT, with its USB slot, I may just plug one of them in there for access by all.

Wednesday, 24 August 2016

Server issues and exFAT

A side effect of regularly running out of space on my MBP is that I need to archive files over to my Ubuntu server (program files, lossless music, etc), as well as back up others.

This happens through my running cron jobs, alongside SuperDuper!

As I don't generally leave the monitor running on the Ubuntu box, I noticed recently that SuperDuper! wasn't working (it couldn't find a source drive).

Rebooting Ubuntu showed that power commenced, with the fans running, but a black screen (no text appearing at all) and no lights illuminated on keyboard. ssh didn't work either.

There's clearly a larger issue to resolve there (possibly related to graphics card), but before that I wanted to archive some data before my MBP was out of space.

The server has three internal drives, one of which is 120GB and dedicated to Videos, and another is 1TB for backup.

Also, there is an external 2TB WD drive.

I started with the latter, as ease of plugging into MBP made it the best place to start.

Sadly, it was read only. I realised I'd formatted in Ubuntu and couldn't write to it in OSX.

So the plan was to copy files, reformat and then copy back. Fortunately I had another 500GB drive I could use for this purpose.

Copying was easy (albeit slow, as both external drives were USB connected to MBP). Then, to check the contents were correctly copied, I ran

diff -rq folder1 folder2 > ~/Desktop.diffs.txt

Again, very slow output on this.

Now for formatting, Based on this article, I reformatted as exFAT. This should allow readability on Windows, OSX and Linux (with suitable packages installed). Reformat only took a few seconds.

Next stage, copy all files back, then re-run the "diff" command to double-check.

Then, delete the files from the 500GB drive, reformat THAT as exFAT, and then back up as necessary.

Final stage, remove the 120GB and 1TB drives from server, connect via a caddy to MBP, copy, diff, format and repeat...

THEN fix the server issue!

Monday, 18 July 2016

Facebook and Google Authenticator

Rather than having 2FA via an SMS message, it is possible to use Google Authenticator.

Choose Settings, then Security > Set up code generator. See below:


Sunday, 17 July 2016

gReader volume controls settings

I keep forgetting where to find this, and invariably end up trying to adjust volume on a podcast and end up moving through articles.

This is where it is:

Settings


Article controls


Volume Key (article view)


Nexus devices with dodgy USB power connections

An increasing frustration is the situation where there is power flowing to the USB cable, but it does not fit as snugly into the slot on the Nexus device any more, leading to eventually the device draining completely.

To save looking it up each time, this is the advice from Google which does seem to work.

  1. Unplug the USB cable from the power adapter and use it to connect your Nexus device to a computer’s USB port while the computer is on and connected to a power source.
  2. After 10-15 minutes, disconnect the USB cable from your Nexus device and reconnect it within 10 seconds.
  3. After 1 minute, check to see if a battery icon appears on the screen.
  4. Press & hold the Power button for at least 15 seconds to see if your device turns on.

And then

  1. Follow the instructions for your Nexus device below:
    • Nexus 5X, Nexus 6P, Nexus 4, Nexus 6, or Nexus 7:
      • Press and hold the Volume Down button and the Power button at the same time for at least 10 seconds. You'll see an Android robot and the word "Start" with an arrow around it.
      • Press the Volume down button to move through options until the screen shows the option to Power off. Press the Power button to select that option.
    • Nexus 5 or Nexus 10:
      • Press and hold the Volume DownVolume Up, and Power buttons at the same time for at least 10 seconds. You'll see an Android robot and the word "Start" with an arrow around it.
      • Press the Volume down button to move through options until the screen shows the option to Power off. Press the Power button to select that option.
  2. Disconnect the charger and reconnect it within 10 seconds. A battery icon should appear on your screen.
  3. Once the battery icon appears on the screen, allow your device to charge for at least 1 hour before turning it back on.

and finally

  1. Make sure the power cord is securely connected to your Nexus device and the power adapter. Leave the charger plugged in to a working power outlet for at least 1 hour.
  2. After 1 hour, disconnect the device from the charger. Reconnect it within 10 seconds.
  3. Press & hold the Power button for at least 15 seconds to see if the device turns on.

Saturday, 9 July 2016

Yet more power cuts badly affecting external Time Machine drive

Having previously posted about issues with power cuts corrupting Time Machine, it happened again this time, but to the extent that the drive didn't even display in Disk Utility.

I followed the steps here:

diskutil list


So the 2TB drive is clearly there. 

Next step - diskutil unmount /dev/disk2

That didn't work ("disk2 was already unmounted or it has a partitioning scheme so use "diskutil unmountDisk" instead"), had to modify slightly to:

diskutil unmountDisk /dev/disk2

Also didn't work - "Unmount of disk2 failed: at least one volume could not be unmounted"

Therefore referred here and tried instead:

sudo lsof|grep disk2

Running processes were displayed:

fsck_hfs  889            root    4u      CHR                1,7 0x1b0508000      693 /dev/rdisk2s2
fsck_hfs  889            root    5u      CHR                1,7 0x1b0508000      693 /dev/rdisk2s2

So I closed these in Activity Manager

At this point, the Time Machine (albeit greyed out) showed in Disk Utility, so next step is First Aid there.

Having also then tried diskutil mount /dev/disk7s2 and getting the response Volume on disk7s2 timed out waiting to mount

I was about to give up. But then, as a last throw of the dice, I tried connecting to my Ubuntu desktop.

Immediately in Home Folder it showed as a mounted drive! So from there I went to Disk Utility, unmounted the partitions, erased and formatted them and then re-connected to Mac.

A Time Machine backup has now commenced.....

Thursday, 26 May 2016

Setting up Amazon two factor authentication in the UK

Brief version extracted from here - http://www.techworld.com/security/how-brits-can-enable-amazon-two-factor-authentication-security-now-3631955/

1. Sign into Amazon.com, rather than .co.uk
2. Go to "Your account > Change account settings"
3. In "Advanced security settings" confirm SMS authentication
4. Enter mobile number, type in the six-digit SMS code sent to that device.

Setting up a new (or reset) Android phone

Although the Google transfer wizard does a pretty good job of installing apps and settings for wi-fi networks, etc, there's still quite a lot to consider.

  • In the case of resetting, it's important to remember that *any* data on the phone is lost. This includes:
    • Documents (and anything else in Downloads)
    • Photos
    • Videos
    • Music
    • Ringtones
    • All SMS messages
So the lesson from this is - *regular* backups, which need to be to a cloud location, not the phone itself

  • Frustratingly, all settings for lock screen notifications are not saved. This means individually setting any apps to Block as appropriate. Time consuming with a lot of apps.
  • Groups of apps on the home screen are not always restored, and - if the Android image is being taken from a different device (such as a tablet) - some apps may be missing and need to be manually installed.
  • Fingerprint unlock needs to be set up again.
  • NFC turned off (seems to be enabled by default)
  • Custom ringtone (if applicable) needs to be saved to phone.
  • Podcast subscriptions should be restored from last full backup. This will also recognise podcasts not previously downloaded (since time of last backup) and kick this off
  • Add clock widget back to home screen
  • Enter credentials into all login based apps
App specific settings

Podcast Addict
Settings > Update > Automatic Refresh = Enabled; Pull to Refresh = Enabled
Settings > Download > Share with other apps = Y
Settings > Notification > Tick "Update in progress", "New episodes", "Comments update in progress", "New comments", "Download in progress", "New downloaded episodes"

Clipper+
Settings > Notifications > Clipboard contents - UNCHECK

1Password
Re-sync with Mac and set up fingerprint unlock

SMS Backup+
Tick Auto backup

SwiftKey
Re-enable as main keyboard input

Authenticator
This is by far the most troublesome app. Particularly if the Android device being reset is also the one containing Authenticator and hence the 2-step verification codes. For Google accounts, the only way I could see to get round this is - on web - disable 2-step verification. Then re-set it up, scanning a new QR image into the Authenticator app - a very clumsy approach to it.
It also means other apps that use Authenticator need to be set up again. This includes:

Microsoft Outlook - sign in on Desktop. Go to Account Settings > Security & Privacy. Then turn off existing Apps. Follow this with install a verification app, but do not choose the app recommended, instead select the option that it's incompatible with your Android. At this stage the QR code will appear and can be scanned and verified.

DropBox - again, sign in on Desktop. This may request a 2-step code, which can be a number sent by SMS. At that point request third party authenticator as main means of authentication. Then scan the QR code with phone, input the code on the desktop to confirm and *then* sign in on Android

IFTTT - sign in on Desktop. Use the very long back up code to verify. Say yes to setting up two step verification. Choose "Use an authenticator app" - then scan QR code as with Outlook and Dropbox.

Authenticator also works for Hootsuite (not an app I currently use)


Monday, 16 May 2016

How to get Dilbert comic as RSS feed

Using this site - https://chrisbenard.net/2013/06/28/how-to-fix-the-dilbert-com-rss-feed/  - I chose the "Modified Atom Feed" and added this to Feedly - success!

Wednesday, 4 May 2016

TV set up

Set up of TV and connected devices.

Rear of Sky+ Box - HDMI and Ethernet


Rear of Sky+ Box - co-ax and Scart


Inputs and outputs to Sky+ box:


Connections to rear of TV


Configuring music library on Sonos

This was working for me after a fashion, but I realised it needed rejigging when I kept getting messages saying the file could not be found.

My music is stored on a networked Ubuntu PC, and on my Mac. I had previously set mappings up such that the links to the networked PC were via mounted drives on the Mac. The downside, of course, to this is that if the Mac was turned off, then the music could not be accessed.

I'm aware that it's necessary to set the relevant sharing options on the Ubuntu PC, so I did that first in file manager:


But it's also necessary to amend the Samba setup:


However, when adding within Sonos I still couldn't get guest access to work. I finally gave up and just resorted to completing the Ubuntu sign on name and password.

Then it was necessary to add the iTunes library on my Mac. I chose the "In my Music folder" option (grayed out here as I've already added it).

But then got the message that the computer could not be found. Odd, as it was on this very computer that I was carrying out the operation!

Turns out there are a couple of tweaks to be aware of. Firstly, in System Preferences > Security & Privacy > Firewall Options it's necessary to uncheck "Enable stealth mode" and also to ensure that Sonos was set up to allow incoming connections (the latter was already correct):

But there's something else. And this is the most important one! In System Preferences > Sharing, the computer name has to be no more than 15 characters and have no special characters or spaces

Once done, the library worked fine!


Sunday, 20 March 2016

Accessing Yahoo Mail through Gmail with two factor authentication

Yahoo mail was previously set up in my Gmail account using the Accounts and Import part of Settings:


However, enabling two factor authentication on Yahoo (Settings > Account Security) stops this working.

The solution is - still within Yahoo Account Security - to add an App Specific Password 


Go to Manage app passwords:


I have added an option of Gmail. This produces a long password which is then used in Gmail *instead* of the Yahoo password - this acts as two factor authentication.

Friday, 4 March 2016

Getting a catalogue of own library in Google Play Books

This function is not currently available, nor is it easy to sort.

So the only alternative I could find was to scroll to the bottom of the library. Then select all on the page and copy into a text document.

This text document can then be pasted into a spreadsheet, blank rows removed, and re-sorted as necessary:
  • Add column to left with numbers ascending
  • Sort by column B ascending + column A ascending - this will group together all blank rows
  • Delete blank rows, then sort again by column A
  • Delete contents of column A, then put in formula in cell A1 of "=B2" (no quote marks)
  • Copy this down
  • Authors are now in column A, titles in column B
As authors are in <firstname, lastname> order, it's not as easy to go through them. This formula in the next column pulls out the surname:

=TRIM( RIGHT( SUBSTITUTE( A1 ; " " ; REPT( " " ; 100 ) ) ; 100 ) )

Saturday, 27 February 2016

Switching internet access from HomeHub 5 to HomeHub 4 .... and back again

The existing HomeHub 5 stopped working, and although a replacement was on order from BT, it would not arrive immediately.

As we still had the old HomeHub 4 (which was being used as a wireless extender), the idea was to re-use that.

The big difference between HH4 and HH5 is that the latter has an integrated modem. So it's necessary to reconnect that for access to the outside world to be possible.

The existing DSL cable from the master socket, rather than going directly into the HomeHub, goes via the modem like so:


And then there is a separate ethernet cable (with the red plug) that goes from the modem into the HH4 like so:


As the HH4 had been used as an extender, it had been give a new IP address. This needed to be changed. For this, an ethernet cable needs to be connected from a laptop to the HH4 directly, going into settings. The HH4 original settings were:


These are simply changed to replace the IP address with the default gateway (which is 192.168.1.254) and *most importantly* turn ON the DHCP server (this is turned off when the HH4 is acting as an extender to avoid conflicts where two HomeHubs are attempting to issue addresses).

This results in:


Once the new HH5 is in place, the modem can be removed, the DSL cable directed straight to the HH5 and the HH4 put back in its place, back to its original settings (with DHCP disabled).

Monday, 1 February 2016

Network set up

To try and get a decent signal throughout the house, this is the set up:


This is the rear of the HomeHub 5, where connection to outside world comes in.

Sonos Bridge is self explanatory. TP-Link is a very long Ethernet cable connecting to TP-Link WA 901 extender in kitchen. On Hub is not currently in use.

The link to Billion Router goes here:


The HomePlug cable goes off to this socket:


And then connects downstairs to a re-commissioned HomeHub 4: